Annotations, comments, and footnotes allow you to add notes to the project while writing, and these notes will not become part of the main text.
During the writing process, sometimes you may want to add notes that are not part of the main text. These notes may be reminders to review certain content, side notes on how to further develop the scenario, or footnotes citing references.
Scrivener provides tools for these requirements. You can add inline annotations, which will be displayed in your project text; Comments, which will be displayed in the Inspector; And footnotes or endnotes, which will appear in appropriate positions when you compile the project.
In this article, I will discuss how to use all of these note taking related features in the Scrivener project.
Annotations, comments, and footnotes
When dealing with projects, you may often want to add comments or annotations. When you need to come up with a better way of describing and hope to come back later to revise, or when you need to remind yourself to enrich a scene, you may add these contents.
Scrivener provides two types of notes: inline annotations and comments. Inline comments are text that you insert into the text, but stands out due to its formatting. Comments are notes that will not be displayed in your text; They will be displayed in the inspector.
Each type of note has its advantages and disadvantages. Inline comments are difficult to ignore: they are in different colors and surrounded by borders in the body of your text. In contrast, comments are displayed in the inspector, and if the inspector is not visible, you cannot see them. You will see text related to comments in the document - it will be highlighted and in a different color - but you need a display checker to see its content.
Footnotes are similar to comments: they are highlighted in the text, their content is in the inspector, but they are intended to be visible when you compile the project, either at the bottom of the page (footnotes) or at the end of the document (endnotes).
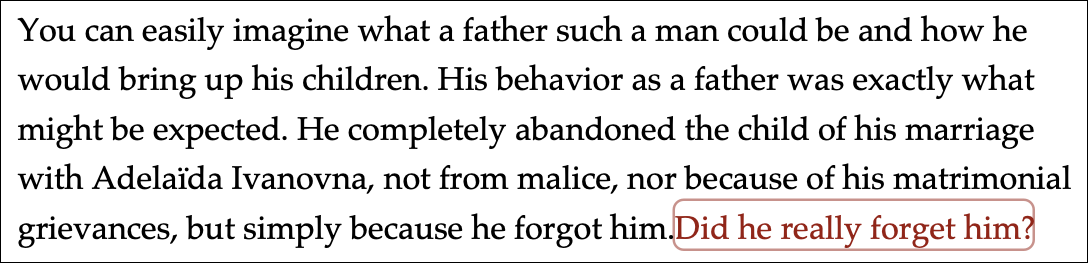
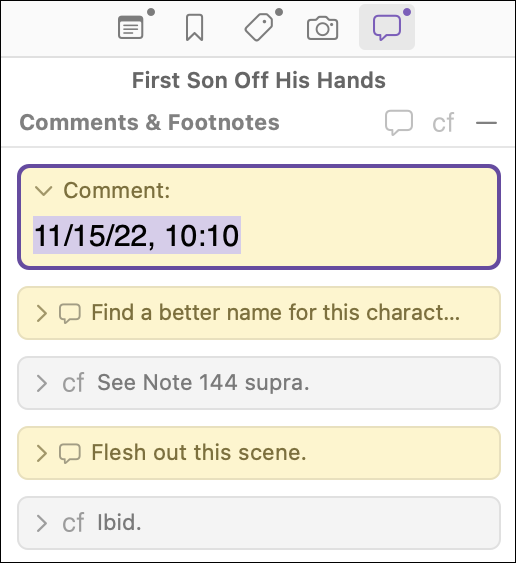
Here are the appearances of these different elements:
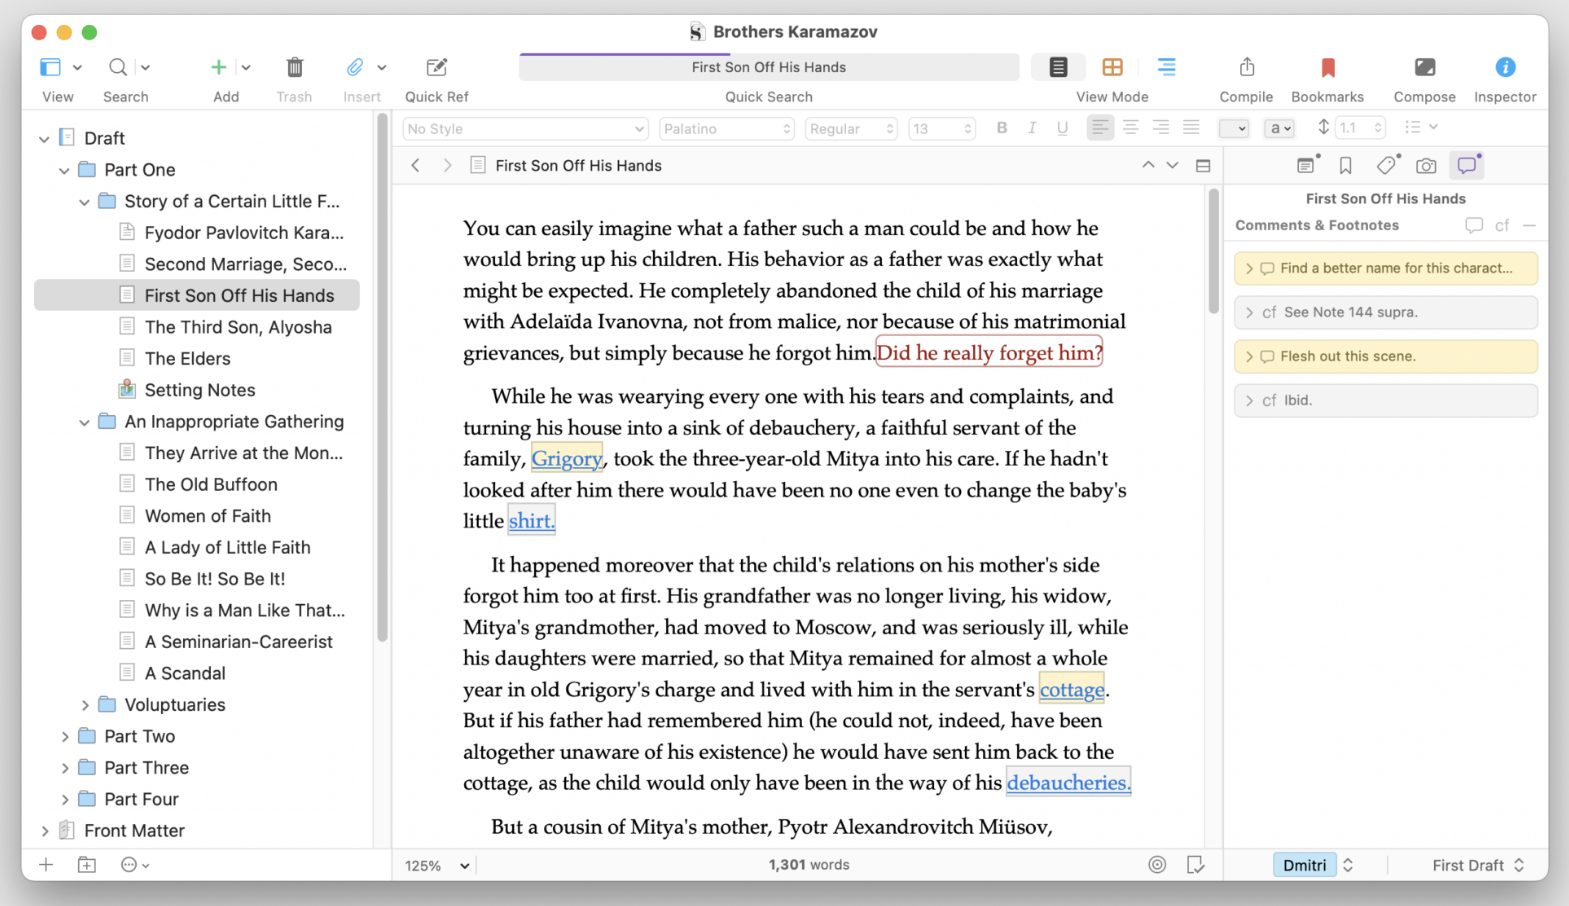
In the screenshot above, inline comments are in red, while comments and footnotes are in blue. Comments are highlighted in yellow in both the text and the checker, while footnotes are highlighted in gray.
Whether to use comments or annotations depends on your own choice. If you don't want to display the inspector, such as because you're using a device with a smaller screen, then annotations may be more appropriate. But if you are dealing with a document that contains a large number of comments, it may be more convenient to view them in the inspector. Clicking on a comment in the inspector will redirect you to the corresponding location in the document.
Comments and footnotes will only appear in the inspector when you select a document that contains comments or footnotes. However, if you click on a folder containing multiple documents - such as a top-level draft or manuscript folder, or a subfolders containing multiple documents - all comments and footnotes in that folder will be displayed in the inspector.
Add inline comments
To add an inline comment, position the cursor at the location where you want to add the comment and select 'Insert>Inline Comment', or press Command-Shift-A (Mac) or Alt+Shift+F4 (Windows). At first, you may not see anything, but when you start typing, the text will be displayed in red with a red border. You can input text of any length, but when you want to return to normal text input, press Command-Shift-A (Mac) or Alt+Shift+F4 (Windows) again.
Inline comments are just like regular text, with additional highlighting. You can apply formatting to inline comments, such as bold or italic, and you can change their color (Format>Color), and you can move inline comments; Just copy and paste them to another location.
To remove inline comments, simply delete their text in the editor.
Add comment
You can add a comment by inserting the cursor at the location where you want the comment to be, or selecting some text. Select 'Insert>Comment' or press Command Shift - * (Mac) or Shift+F4 (Windows). When you do this, you will see a new comment in the inspector: the comment will display the date and time, and this text will be selected. You can start typing to replace it, but if you want to keep the date and time, just press the right arrow key before starting typing.
Comments are associated with text, and you can click on any comment in the inspector to jump to its location. You can move a comment to a new location: simply click on a comment in the inspector and drag it to the position you want it to appear in the text. Moreover, if you select some text - a word, phrase, or paragraph - in the editor and drag a comment onto the selected text, the comment will be applied to that selection.
To delete a comment, click on the small "x" in the top right corner of the comment box in the inspector.
Add footnote
If you look at the first screenshot of this article, you will find that the footnotes are very similar to the comments. The main difference lies in when you compile the project; Footnotes can be displayed at the bottom of the page or at the end of the document you have compiled. Comments are not intended to be included in the final document.
Footnotes usually follow a certain style, depending on your audience: you may need to use APA, AMA, MLA, Chicago Handbook, or other footnote styles. Scrivener maintains neutrality in footnote style; You can format the footnotes yourself (although there are some third-party tools that can help you with this task).
To add a footnote, place the cursor at the location where you want the annotation to appear and select 'Insert>Footnote', or press Command-CControl-8 (Mac) or Shift+F5 (Windows). Like comments, you can drag footnotes from the inspector to any location in the document.
To remove a footnote, click on the small "x" in its box in the inspector.
Convert footnotes and comments
As you can see above, there is not much difference between footnotes and comments, except for their highlighted colors. In fact, if you are willing, you can convert them into each other. Right click on any footnote or comment in the inspector and select 'Convert to Comment' or 'Convert to Footnote'.
As usual, more information about annotations, comments, and footnotes can be found in the Scrivener manual: Chapter 18, "Annotations and Footnotes," provides detailed information on other available options for these notes.
Content translation from:https://www.literatureandlatte.com/blog/use-annotations-comments-footnotes-in-your-scrivener-projects
 Scrivener 3 paper/novel writing tool artifact software